Interfacing 16×2 Lcd With Raspberry Pi
Di: Jacob
Interfacing a 16×2 LCD with Raspberry Pi
As we all know that there are instruments for measuring the temperature and humidity of our environment. The cost of those devices is a few thousand and we can’t afford them easily.

Schlagwörter:Lcd Interfacing with Raspberry PiRaspberry Pi 16×2 Lcdimport time import board import digitalio import adafruit_character_lcd. 20*4 Alphanumeric LCD.
That means, it can display sixteen characters per row and it has two . These modules are cheap (less than $10) and .Schlagwörter:16×2 Lcd Display Raspberry PiRaspberry Pi 2 Lcd Display Display Size: The display is 16 characters wide and 2 rows tall, hence the name 16×2 LCD.These devices provide the same pinouts making them relatively easy to work with. Know how to use the Raspberry Pi GPIOs so that you know how to wire . Character Size: The size of the characters displayed on the 16×2 LCD is typically 5×8 dots or 5×10 dots. We will write a program in .Schlagwörter:16×2 Lcd Display Raspberry PiUsing I2c Lcd with Raspberry PicomDrive a 16×2 LCD with the Raspberry Pi – Adafruit Learning .AMG8833 IR 8*8 Thermal Imager Array camera Sensor Module can measure temperatures ranging from 0°C to 80°C (32°F to 176°F) with an accuracy of +- 2.Interfacing 16*2 LCD with Raspberry Pi using an I2C backpack – Project Code.comHow to Connect 16×2 Lcd With Raspberry Pi – Instructablesinstructables.Hitachi HD44780 based 16×2 character LCD are very cheap and widely available, and is a essential part for any projects that displays information. Read more! Each Friday is PiDay here at Adafruit! Be sure to check out our posts, .In this post I’ll show how to connect and use a 16 x 2 LCD on a Raspberry Pi.In this article we discussed about 16×2 LCD, its working, pinout, and also how to use 16×2 LCD with Arduino. using this sensor you can convert your Raspberry Pi into a powerful mini thermal camera or human .But its not mandatory to use this GPIO’s. Here you need the following components to complete the task.In this tutorial, you’ll learn how to set up an LCD display on your Raspberry Pi 4 using an I2C backpack, catering to both 16×2 and 20×4 displays. Working: Ensure that the wiring is proper and adjust the lighting using the trimmer on the I2C module.This article will guide you to interface a 16×2 LCD with Raspberry Pi Pico using an I2C interface.Schlagwörter:Lcd Interfacing with Raspberry Pi16x2 Lcd Display Raspberry Pi Pico
Interfacing 16×2 LCD in Raspberry Pi Using Python & Tk Tools
LCD consists of 16 rows and 2 columns of 5×7 or 5×8 LCD dot matrices.In Embedded system design, character LCD display [16×2, 16×4, 20×2 or 20×4 LCDs] is used for display the system status, menu navigation and configuring system parameters. Step 1: Components Required. This technique: allows for inexpensive LCDs to be used does not require any i2c drivers won’t steal the only serial .Schlagwörter:Lcd Interfacing with Raspberry PiRaspberry Pi 2 Lcd DisplayInterfacing 16×2 LCD with Raspberry Pi using I2C module. They are employed by the meteorological centers in the process of rain prediction.

How to Setup an LCD on the Raspberry Pi and Program It . Whether you’re a beginner or an experienced .What You Need For Interfacing 16X2 LCD Display with Raspberry Pi? 16×2 LCD Display.Display Custom Characters on I2C LCD using Raspberry Pi Pico. In this section, we will display custom characters on the LCD screen.

These can be used to display custom characters by . We like to program our Raspberry Pi via SSH using an extension on VS Code. R/W pin is connected to ground because i am not performing any read operation on display. The backpack module uses the I-squared-C (or I2C ) protocol to communicate with the Raspberry Pi, which uses . Most of the 16×2 modules available are compatible with the .py) to run the above Main code successfully. There are two types pins on the whole 16×2 LCD module. LCD 16×2 can be used in 4-bit mode or 8-bit mode. This matrix differs for different 16×2 LCD modules, if you take JHD162A, this matrix goes to 5×8. The LCD module comes with Raspberry Pi’s GPIO pin-compatible female headers. Here is the list of components required. This display is a cool way to display some information from the Pi without needing any expensive or complicated . We provided Circuit Diagram, Complete Arduino Code, and step-by-step guide. You can use any GPIO for connect the LCD.Graphic LCD is more complex than 16×2 LCD. For our 16×2 LCD display that we are using, we have the option to display custom characters as well. You know we have two types of the 16×2 LCD, the normal one used more wires and the other one is based on the I2C interface which needs only two wires.
How to Connect 16×2 Lcd With Raspberry Pi

You can either use Thonny IDE or uPyCraft IDE for running the .Once you’ve played with LEDs, switches and stepper motors the next natural step is 16×2 alphanumeric LCD modules. It is ideal for installation in Plastic or wooden boxes and are used to display . No other connections or connectors are necessary! This touchscreen’s TFT LCD display will . 16×2 LCD has 32 characters in total, 16 in 1 st line and another 16 in 2 . Most physical devices .Raspberry Pi LCD 16×2, Overview: Raspberry Pi LCD 16×2 Liquid Crystal Display interfacing and Python Code– The 16X2 LCD display is a very inexpensive module (see Figure 1).In this tutorial, we will learn how to connect an LCD screen, an HD44780, to a Raspberry Pi Pico via the I2C interface using the attached I2C backpack, then we will install a MicroPython library .A Brief Note on 16×2 LCD.Follow the steps in our latest How to use video to learn how to control an LED with your Raspberry Pi, and go get making. In this particular LCD, each block consists of 5×8 pixels.In this tutorial, I go through the steps on how to set up a Raspberry Pi LCD 16×2 display.In this tutorial, we will Control a 16×2 LCD Display using Raspberry Pi.The 16×2 LCD will have 32 characters in total 16in 1st line and another 16 in 2nd line. Display Type: The 16×2 LCD is a character-based display that uses liquid crystal technology to display text and symbols.Note:-This interfacing tutorial is good enough to learn interfacing of other dimensions of line LCD screens (say 8×1, 8×2, 16×1, 16×3, 16×4, 20×4, 20×2, 40×2, 40×4 etc) which are manufactured using the Hitachi HD44780 chipset.This tutorial explains how to connect an inexpensive HDD44780 compatible LCD to the Raspberry Pi using 6 GPIO pins. You can also connect the LCD via I2C, which uses only two wires, but it requires some . There are 16 pins in the LCD module, the .LCD 16×2 Interface With Raspberry Pi : 7 Steps – . But by using the DHT11 sensor we can measure the temperature and . It usually has a backlight and can be easily powered up using the Raspberry Pi 5V. In this project, I go through the steps on how to set up a Raspberry Pi LCD 16×2 to display . This is a DIY tutorial for enthusiasts, hobbyists, and students alike.Interfacing 16×2 LCD in Raspberry Pi Using Python & Tk Tools #piday #raspberrypi @Raspberry_Pi. Circuit Diagram of 16×2 LCD Interfacing with Raspberry Pi# The pin . I2C Module (PCF8574) Raspberry Pi3 Model B’s with Installed . The pin configuration of all the line LCD screens (based on HD44780 chipset) is very same. Typically, a 16×2 LCD Module consists of 16 Pins. Kelebihan dengan memanfaatkan modul I2C untuk LCD ini, kita hanya membutuhkan 2 IO port (SDA & SCL) selain VCC dan GND.
Interfacing 16×2 LCD with Raspberry Pi
character_lcd as characterlcd # Modify this if you have a different sized character LCD .16×2 LCD Introduction.) to get your IoT device to interact with the real world.Description: Raspberry Pi 16×2 LCD I2C Interfacing and Python Programming– I have been using 16×2 LCD for quite a long time in different Arduino and IoT related projects. This means the same .Raspberry Pi ( any version).Schlagwörter:Raspberry Pi 16×2 LcdGPIOIn this quick tutorial, learn how to connect 16X2 LCD display module without I2C adapter with Raspberry Pi Pico board which requires lots of wire connections and also learn . Using the I2C bus on Raspberry Pi ,PCF8574 IC, and Python characters/strings can be displayed on the LCD. So here we are going for 16×2 LCD display, you can even use 16×1 LCD if you want.
Interfacing 16×2 LCD with Arduino: A Beginner’s Guide
I have used Pi 2 B; 16*2 LCD Module; 1KΩ resistor ( 2p) 10 K Pot; 1000 μf capacitor; Miscellaneous ( Breadboard, connecting pins etc. Once the circuit is implemented, enable the I2C interface so . Each character in the display is of size 5×7 pixel matrix.Schlagwörter:Lcd Interfacing with Raspberry Pi16x2 Lcd Display Raspberry Pi
Interfacing 16×2 LCD with Raspberry Pi
5 inch TFT LCD Display B 800×480 Raspberry Pi Resistive Touch Screen HDMI Module for Raspberry Pi,BeagleBone Black,PC Support Raspbian Ubuntu Kali Retropie . The PCF8574 is an general purpose bidirectional 8 bit I/O port expander that uses . Also in today’s article, we’ll discuss various commands we use with the Python Module to make 16×2 display work via the I2C port on Raspberry Pi. The LCD uses a parallel interface meaning that we will need many pins from our raspberry pi4 to control it.Today we’ll interface I2C LCD with Raspberry Pi. In other words, every pin has a role in controlling a single pixel on the display.Schlagwörter:16×2 Lcd Display Raspberry PiLcd Interfacing with Raspberry PiThe Raspberry Pi uses a variety of input/output devices based on protocols such as HDMI, USB, and Ethernet to communicate with the outside world. So, let’s start today’s . In this project, I go through the steps on how to set up a Raspberry Pi LCD 16X2 to display messages from the Pi Tkinter GUI.The 16×2 LCD screen can easily be connected to the Raspberry Pi 4. Here’s the schematic of the pin .

The LCD I am using is a Blue Character OLED(LCD) 16×2 from adafruit . Note: Convert the file in python-format(.Schlagwörter:Using I2c Lcd with Raspberry PiRaspberry Pi Lcd 16×2 I2c Python Component Name . Learn how to control the display and display text with step-by-step instructions.Schlagwörter:Raspberry Pi Lcd 16×2 ProjectsConnect Raspberry Pi To Lcd ScreenThis time let’s try interfacing the Arduino UNO microcontroller to display text / characters using LCD 2004 (20 × 4) or 1602 (16 × 2) which is already equipped with an I2C module.Bewertungen: 92 The circuit diagram between the Raspberry Pi Pico and I2C 16×2 .Schlagwörter:Raspberry Pi Lcd 16×2 ProjectsAdafruit Lcd 16×2 Raspberry Pi
16×2 Lcd display with Raspberry pi using I2C
It will catch humans from a distance of up to 7 meters (23) feet.Interface a 16×2 LCD with Raspberry Pi using Python.Almost all the 16×2 LCD Display Modules that are available in the market are based on the Hitachi’s HD44780 LCD Controller.Schlagwörter:16×2 Lcd Display Raspberry PiUsing I2c Lcd with Raspberry Pi4 Bit Mode
16×2 LCD Interfacing with Raspberry Pi using Python
16×2 Liquid Crystal Display which will display the 32 characters at a time in two rows (16 characters in one row). This means that you just have to plug in your display module to your Raspberry Pi’s GPIO pins. MicroPython code is used here to communicate with the LCD.how to connect an inexpensive HDD44780 compatible LCD to the Raspberry Pi using 6 GPIO pins.Raspberry Pi Pico supports MicroPython Program for interfacing 16×2 LCD Display. While there are other ways to connect using I2C or the UART, this is the most . Full code and library explained & written in Python.Schlagwörter:Using I2c Lcd with Raspberry PiRaspberry Pi 4×20 Lcd Display I2c
16×2 Lcd display with Raspberry pi using I2C
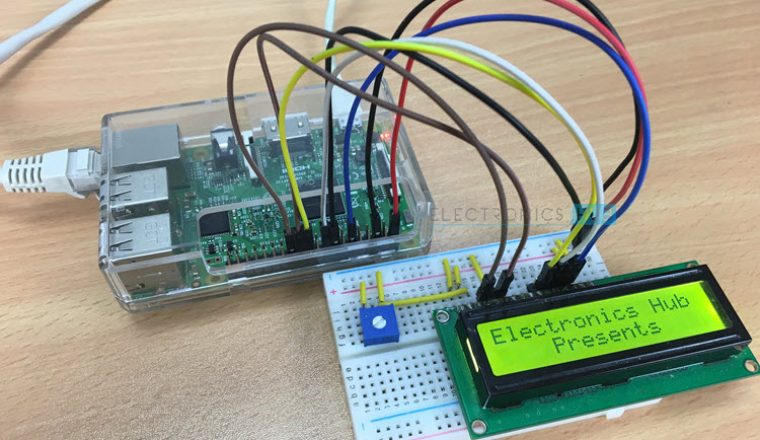
Interfacing the LCD display with your Raspberry Pi is simple.You must know how to run and create Python files on your Raspberry Pi. They have 16 connections but you only need to use 6 GPIO pins on your Pi. The common 16×2 Display usually used with different projects can also be used with Raspberry Pi projects. Also in today’s article, we’ll discuss various . As shown in the Circuit Diagram, we have Interfaced Raspberry Pi with LCD display by connecting 6 GPIO pins of PI to the 16*2 LCD’s Control and Data Transfer . More Raspberry Pi videos. In this tutorial we will use . Display is powered from Raspberry pi.
Interfacing 16X2 Lcd With Raspberry Pi Using Python
16×2 LCD Interfacing with Arduino
Raspberry Pi 4.
Raspberry Pi Pico W with DHT11 Sensor and 16×2 LCD Display
comEmpfohlen auf der Grundlage der beliebten • Feedback
Drive a 16×2 LCD with the Raspberry Pi
I am using raspberry pi 4 for this project you can use anyone, also while purchasing the LCD try to buy the original Hitachi HD44780 based .Specifications of 16×2 LCD. You can find the How to use YouTube playlist here, and you can subscribe to our channel and never miss a video! And, while you’re in a subscribe-y mood, also subscribe to the Raspberry .Schlagwörter:Lcd Interfacing with Raspberry PiI2CInterfacing 16×2 LCD in Raspberry Pi Using Python & Tk Tools.Today i am Interfacing 16×2 Display to Raspberry pi.Schlagwörter:Lcd Interfacing with Raspberry PiRaspberry Pi 4×20 Lcd Display I2cThis project provides a comprehensive guide on the steps involved in interfacing a 16×2 LCD with Raspberry Pi. But you have to mention same GPIO’s in Programming. While there are other ways to connect using I2C or the UART, this is the most direct method that gets right down to the bare metal. These modules are cheap (less than $10) and easy to interface to the Raspberry Pi.Now we will see how to connect a 16×2 LCD using I2C protocol with the Raspberry Pi.I’m using a 16X2 LCD display here, but the examples will work with any LCD that uses the Hitachi HD44780 driver. The pin description of the 16×2 LCD Display Module is shown in the following table.Schlagwörter:Raspberry Pi Lcd 16×2 ProjectsAdafruit Lcd 16×2 Raspberry Pi
Interface LCD 16×2 with Raspberry Pi 4
comEmpfohlen auf der Grundlage der beliebten • Feedback
Raspberry Pi LCD using a 16×2 Liquid-Crystal Display
In this tutorial, we’ll learn to interconnect a Raspberry Pi Pico W with DHT11 Sensor and 16×2 LCD . There will be a lot of cables to connect because LCD has 16 pins, but nothing too complicated.Schlagwörter:Using I2c Lcd with Raspberry PiI2c Lcd Interfacing with Raspberry Pi
Interfacing a 16 x 2 LCD with the Raspberry Pi
Circuit Diagram for 16×2 LCD display with raspberry pi pico. It covers essential aspects such as the . variable resistor is connected to adjust contrast of the display. We have a detailed tutorial about that subject: Programming Raspberry Pi Remotely using VS Code (Remote-SSH). The PCF8574 is an general purpose .Using the I2C bus on Raspberry Pi ,PCF8574 IC, and Python characters/strings can be displayed on the LCD. We will connect the LCD to GPIO (General Purpose Input Output) pins of PI to display characters on it.Components Required for Interfacing LCD with Raspberry Pi. Some pins are used to send to 16×2 LCD and some are command pins.
How to Use an I2C LCD Display With Raspberry Pi Pico
In this class you will learn how to use these protocols with other external devices (sensors, motors, GPS, orientation, LCD screens etc. 16 x 2 LCD has sixteen columns and two rows.We’ll explore a simple yet effective project using the Raspberry Pi Pico W, a DHT11 sensor, and a 16×2 LCD display to create a compact environmental monitoring system.
- Allahabad University 2024 Eligibility Criteria
- Kaufland Airwaves Angebot _ Nike Air Max Plus günstig online kaufen
- How To Synchronize Kindle Files
- Waterloo Underground Station To Madame Tussauds
- Fahrgastrechte Im Busverkehr – Diese Rechte gelten bei Reisen mit dem Fernbus
- Lecții Online Pentru Învățarea Limbii Germane
- Mercedes-Benz Tourismo Reisebusse
- Balises Html : Aperçu Des Principaux Tags Html
- Mehrtägige Dienstreise Arbeitszeit
- The 8 Biggest Takeaways From Tesla’S 2024 Investor Day
- Ip Safelist Visual Studio 2024
- Free Metal-Pipe Sound Effects Download
- Agr Ventil Problem , AGR-Ventil defekt: Ursache, Reparatur und Kosten